Getting Started
The purpose of this guide is to quickly bring you up to speed with the Network Management extension. To do so, we will cover three key sections:
Section 1: Creating Networks
A network is a construct that enables users to organize and partition resources within an Appspace account. It allows for the grouping of users, applications, and devices into a hierarchical architecture. Some of the motivation for using networks is to replicate or mirror the organizational structure of an enterprise within the Appspace system. This type of planning enables users to remain within their scope while simultaneously giving management level administrators a high-level overview.
The resources that are grouped within a network are the following:
- Users
- User Groups
- Applications
- Content (media assets)
- Devices
Each network is represented as a hierarchical tree structure. Every Appspace account comes configured by default with one root network that can be divided into other sub networks. A user within a network has visibility to resources within the network and any other sub-networks that branch from within (under) it.
Creating Networks
Step 1
Click the + button to begin adding a new network under the “Appspace” root network.

Note
Networks can be created/added to any existing branch (node) – you are not limited to creating only from the root node. You will select the parent note of the new network to be created in the next step.
Step 2
On the Create a New Network page, complete the various fields for the details of the network. Under Network Hierarchy, select the parent node in which the new network will be created and reside in. Click the Save button when finished to finish creating the network. You should be returned to the main Networks tab and see your newly created network listed on the main tree in the left-hand column.

Note
Repeat this process as many times as needed, creating additional network nodes and sub-networks, until you’re satisfied with the overall network tree structure.
Creating New Network Properties
As previously described, network properties are typically non-visual settings that may include things such as screen burn time, device credentials, or software update configurations. The network properties listed and defined at each level of the network will be applied to all media player devices within the network as well as any of its sub-networks.
Step 1
From within the Network Management extension, select the Networks tab. From the left-hand column, select the desired network node in which to add new network properties. Click on the Properties sub-tab.
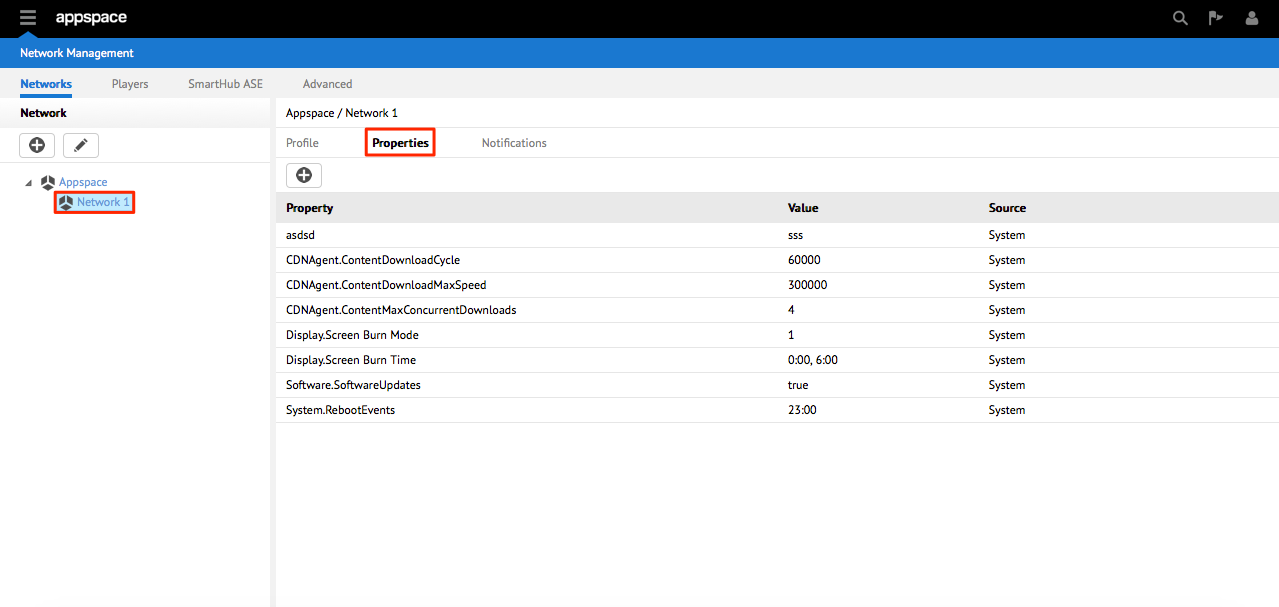
Step 2
Click the + (New Property) icon to begin adding a new network property for this network node. You should see a new row appear that allows you to enter the Property and Value of this entry. When finished, click the Save icon.

Note
- You are also able to edit any existing property by clicking the property’s row.
- Remember that all devices within this network node as well as devices in sub-networks under this node will also inherit these properties.
Section 2: Registering Devices
When you access the Players tab for the very first time, you will be presented with an empty listings page. At this point, you should begin the device registration process for your media players. There are several different methods to register a device to the Appspace server:
- Online Registration: if the Appspace server is located on the same network as the media player device, you may choose to use the online registration tool.
- Registration URL: you can register a device directly from a browser through other management interfaces (such as the Cisco Digital Media Manager server or the DMP Device Manager) through the use of a registration URL. This registration URL is typically directly related to your Appspace server’s DNS name.
- Device Wizard: the various player device wizards are available from the Downloads section of your Appspace server (extensions drop-down menu). These wizards will guide the user through the whole device registration process. This is the most typical and widely used method of registration.
We will proceed by using the Online Registration option.
Note
It should be noted that Online Registration is not applicable to all device types. Please visit the Knowledge Center and reference the relevant articles for the specific type of device you would like to register and the possible registration methods.
Device Registration (Online)
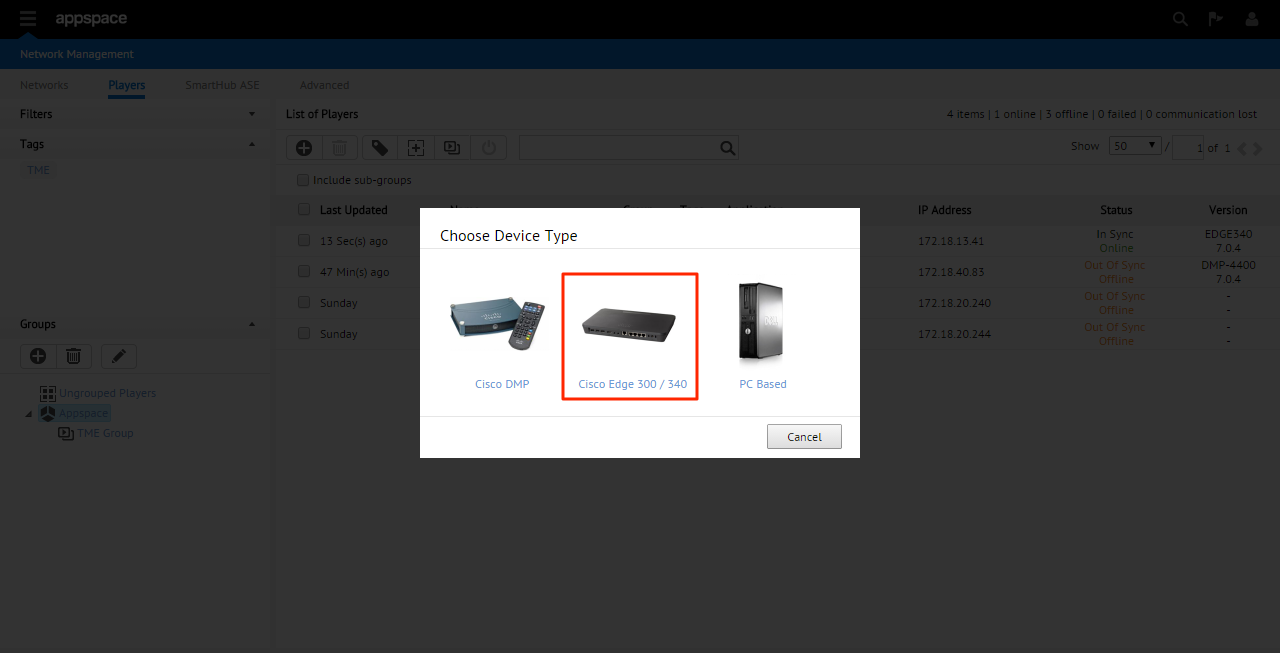
Step 1
From within the Network Management extension, select the Players tab. Click the + button from the main toolbar in the center of the listings page to register a new player.

Step 2
Select the type of device/player to be registered from the pop-up menu.
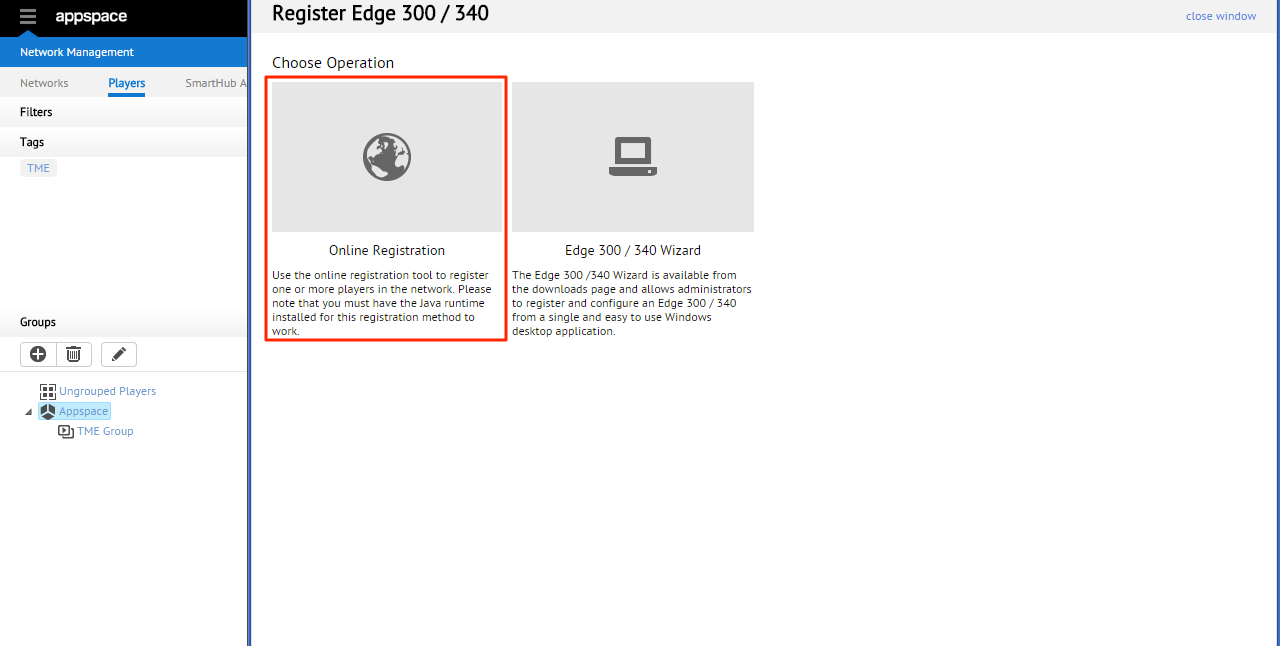
Step 3
Select the Online Registration (far-left) option to continue with the registration process.
Step 4
Fill in all of the relevant fields such as the Device IP and Credentials. Click Scan Devices to begin the device search.
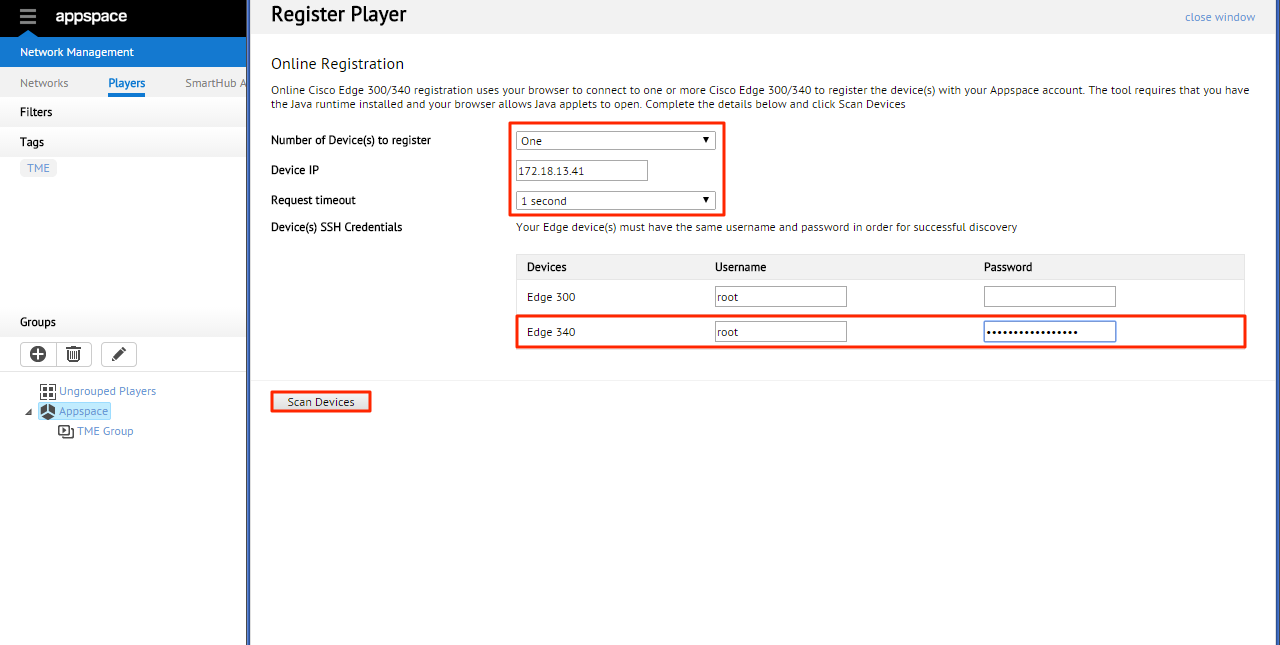
Note
The most common/typical Content Delivery Method is usually Download Manager.
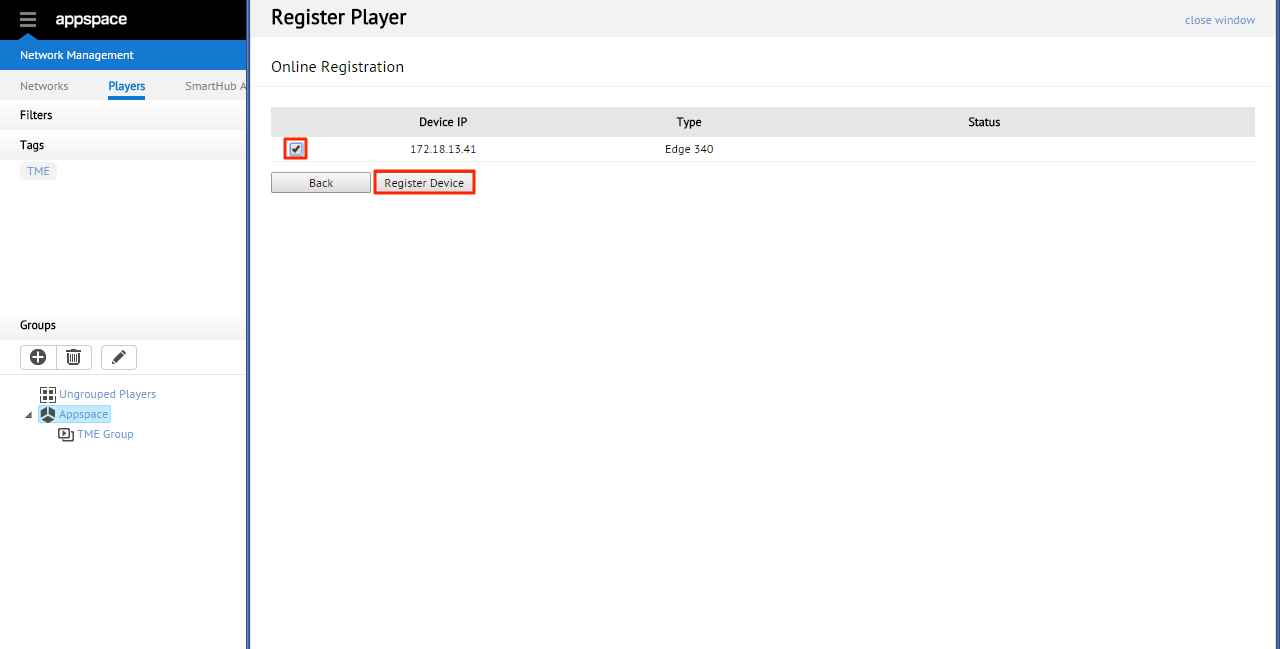
Step 5
The tool will display the Edge 340 found within the defined IP or IP range. Select the checkbox of the Edge 340 you want to register and click Register Device. This process will take up to a few minutes depending on the number of Edge 340 being registered.
Note
The status column is continuously updated and refreshed to reflect each device’s registration progress.
Step 6
Once the registration process is complete, a summary at the bottom of the page displays the number of devices successfully registered/failed.

Note
You can choose to register multiple devices by selecting the multiple device option in Step 4.
Section 3: Managing Devices
Creating Device Groups
Device groups are primarily used for management and organization purposes to group/collect player devices. When creating these device groups, they can be nested within each other to form a logical hierarchy tree. However, it should be noted that players/devices can only belong (be assigned) to one device group.
Step 1
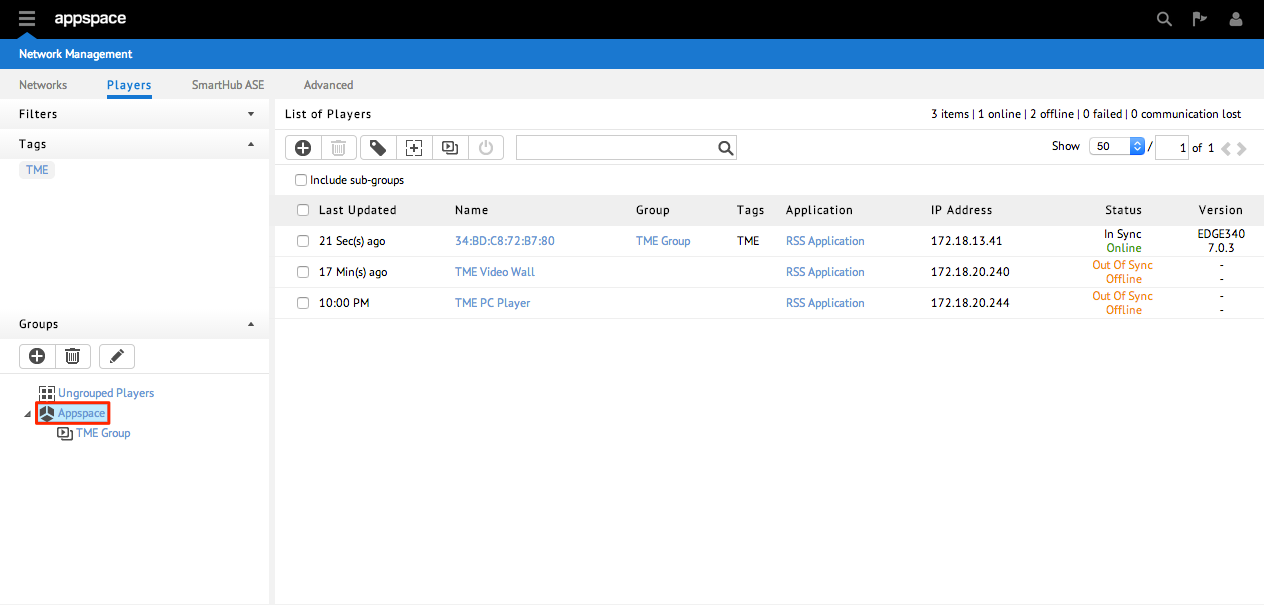
From within the Network Management extension, select the Players tab. Click to select the “Appspace” device group under the Groups section on the left-hand side.
Note
The default “Appspace” device group cannot be deleted.
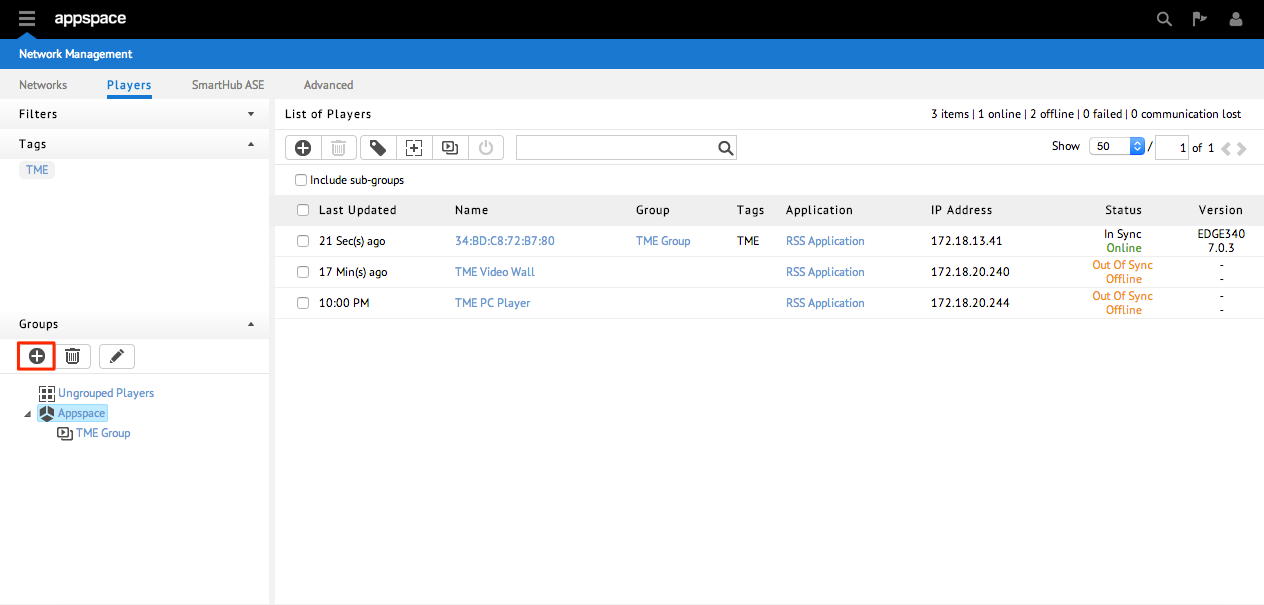
Step 2
Click the + button to create a new device group. Enter a name for the group.
Note
Repeat this process as many times as needed until you’ve created the desired device group hierarchy structure for your organization’s needs.
Add Devices into Groups
Once your device group hierarchy structure has been created, you will most likely need to move/add your devices into their respective groups. Remember, each device can only be assigned to one group.
Step 1
To view ungrouped (likely recently/newly added) players, you must select the “Ungrouped Players” folder. All available devices that have not yet been associated to a group will be presented in the device listings. To move/re-assign devices to new groups, simply click on the main root “Appspace” group to populate the listing with all devices.
Step 2
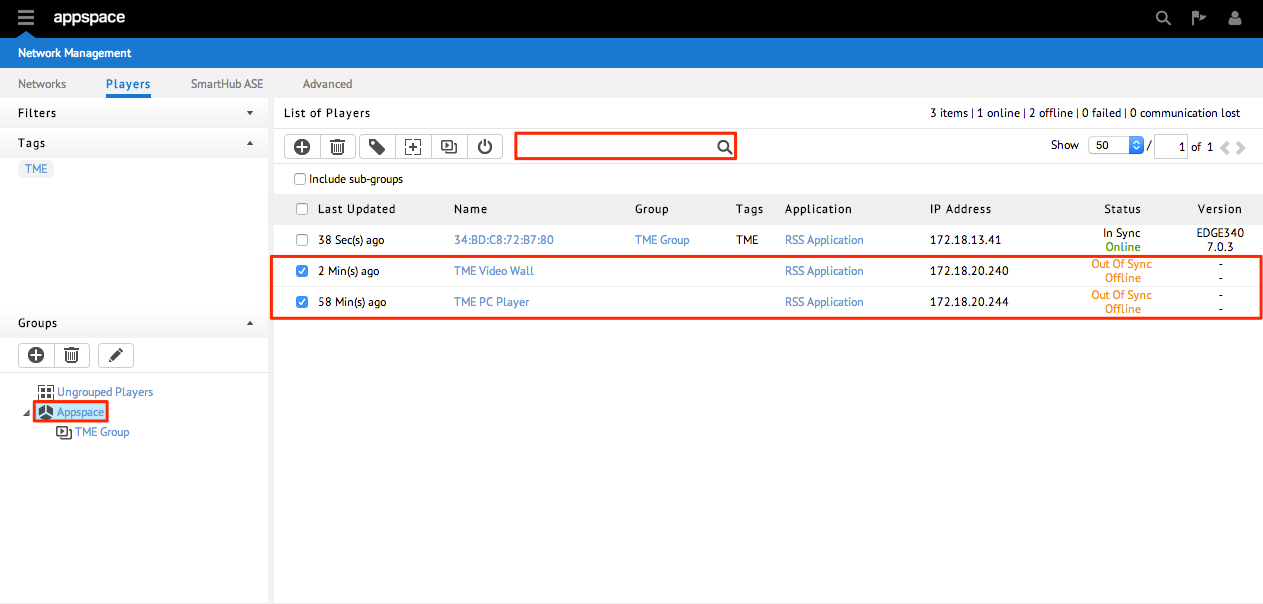
Check the box(es) next to the desired device(s) to be assigned to a group. Click the Move to Group icon.

Warning
Please ensure that the devices you’ve selected have already been assigned with applications. The devices cannot be moved if they are not assigned to any application.
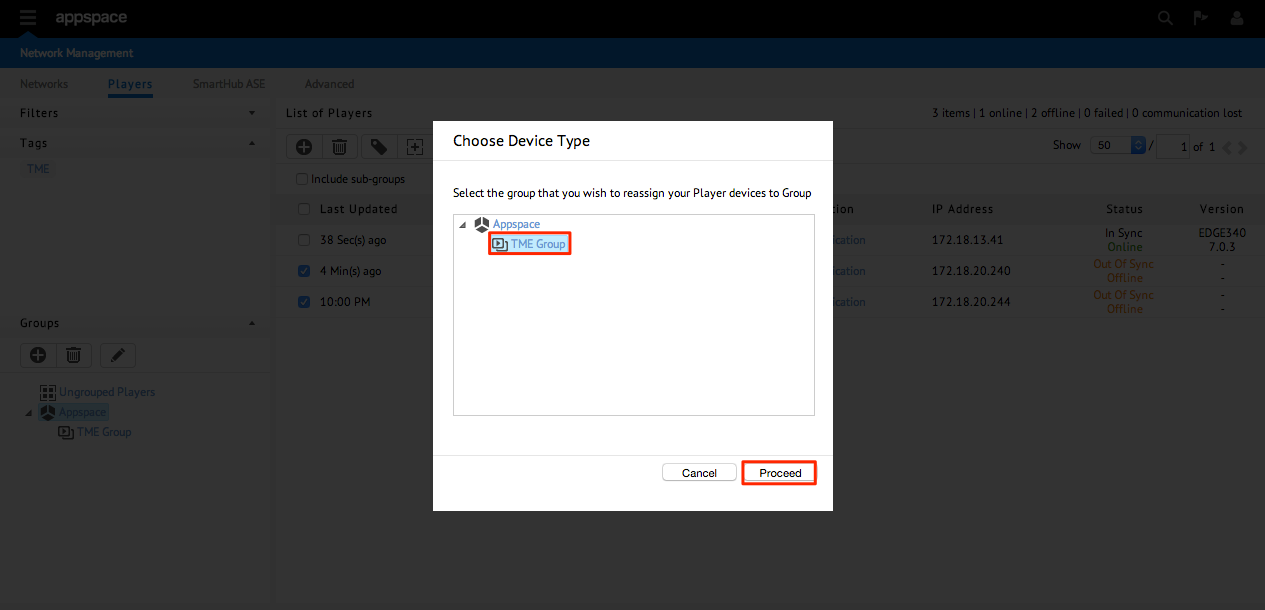
Step 3
On the Group Players window, select the desired device group from the tree hierarchy. Click Proceed to complete the device group assignment.
Step 4
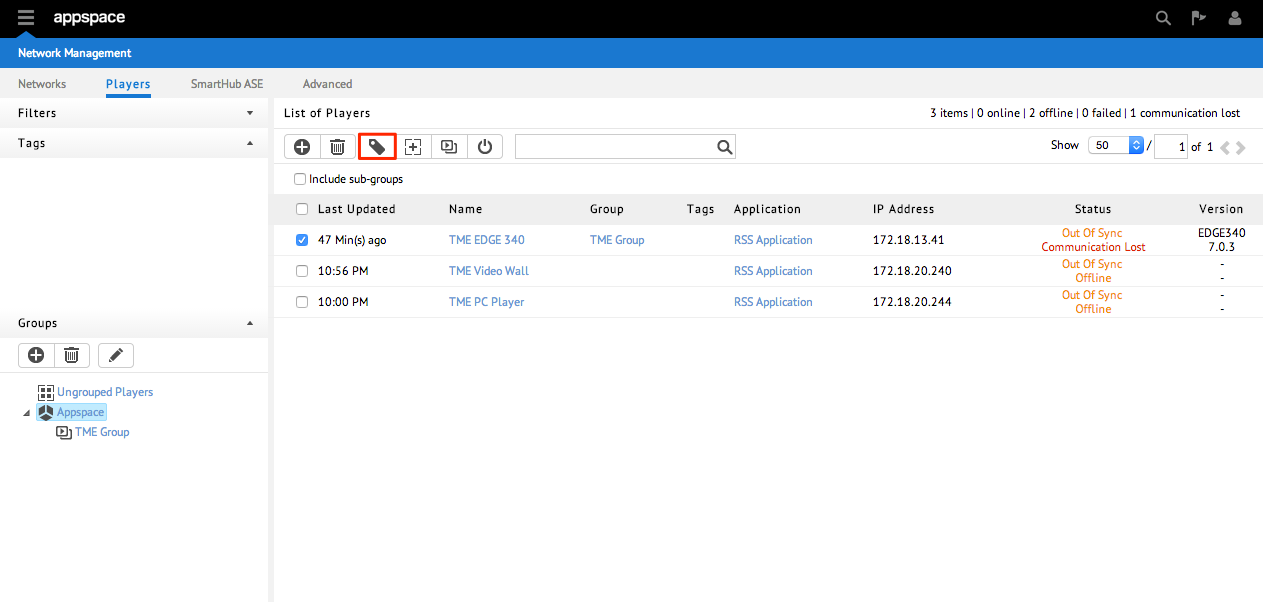
Verify the selected player(s) have been associated and grouped under the desired device group in the main device listings.

Add Device Tags
Device tagging allows your player devices to be grouped into non-hierarchical and non-exclusive sets. Tagging is most commonly used to group players by functionality or geographical locations. Device tagging is also used in conjunction with content tagging to enable targeted content distribution.
Step 1
To tag devices, click the box(es) next to the device(s) to be tagged.

Step 2
Click the Tag icon at the top of the page.
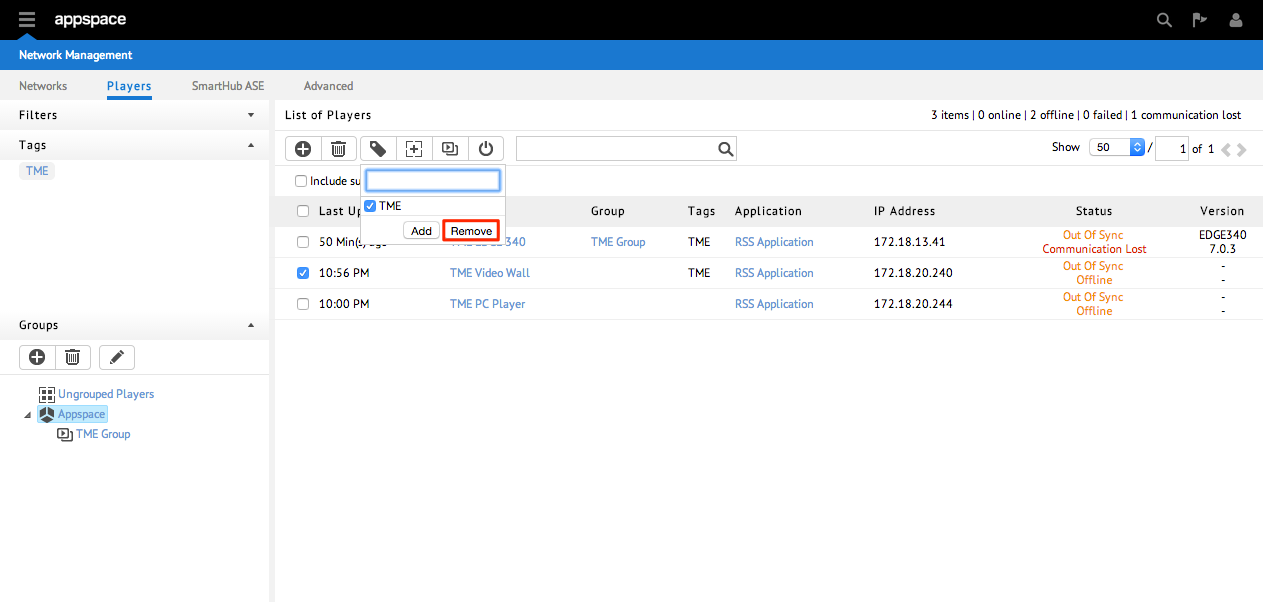
Step 3
Type in the tag(s) you want to assign to the player(s). Separate tags with a comma when using multiple tags. Alternatively, if the desired tag already exists – simply select the checkbox next to the tag. You can assign/select multiple tags per device.
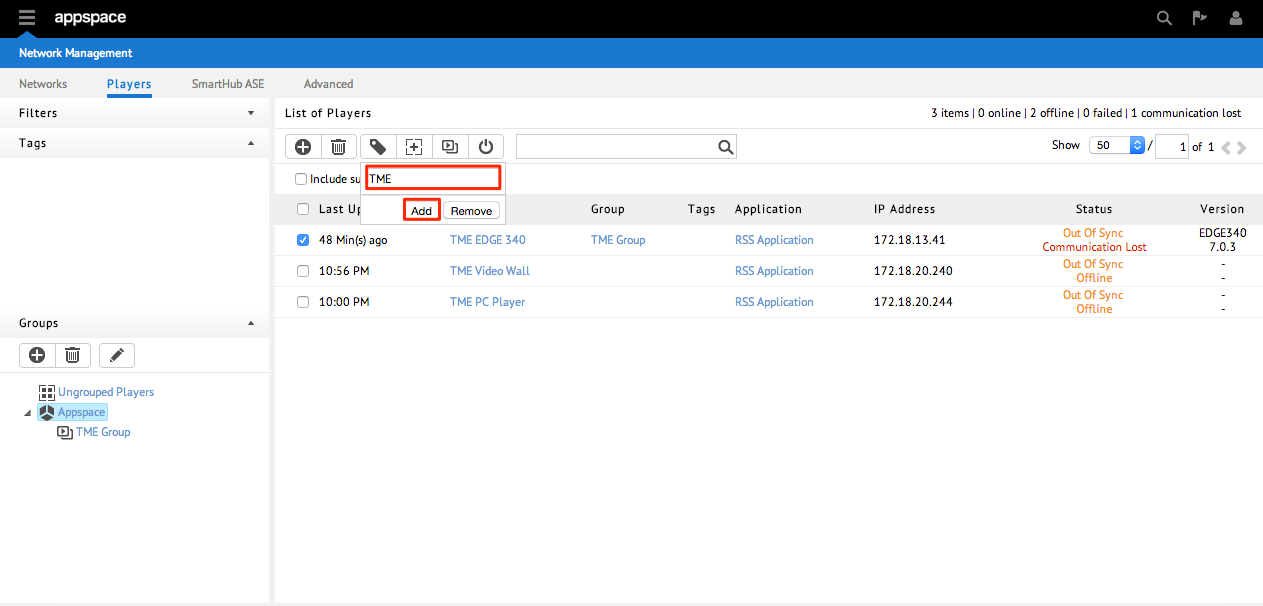
Step 4
Click the Add button to complete the tagging of the player(s) with the newly added/selected tag(s).
Recap
Your Network Management extension should now be set up and able to perform the following:
- View the network tree and related statistics per tree node
- Add/edit additional network properties per network
- Monitor and configure additional notifications per network
- Manage players/devices that are registered to your Appspace server
- Organize and sort players/devices into hierarchical device groups
- Utilize group tags for an added level of filtering