MySQL Setup (Workbench)
Introduction
Once MySQL has been installed on the Windows server, it must be configured to enable the interaction of database services with Appspace. The setup and configurations are performed using MySQL Workbench.
The following steps outline the procedure to configure MySQL to prepare the server and database for the installation of Appspace.
Step 1
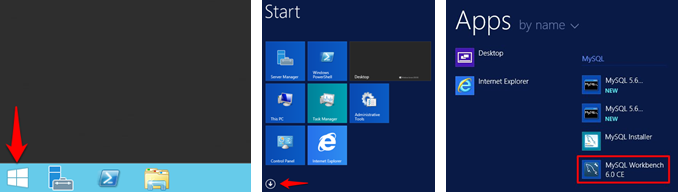
Start MySQL Workbench.
In Windows 2008, click on the Start button and select MySQL Workbench 6.2 CE (in the MySQL folder) from the menu.

In Windows 2012, click the Windows icon and select MySQL Workbench 6.2 CE from the Apps menu.
Step 2
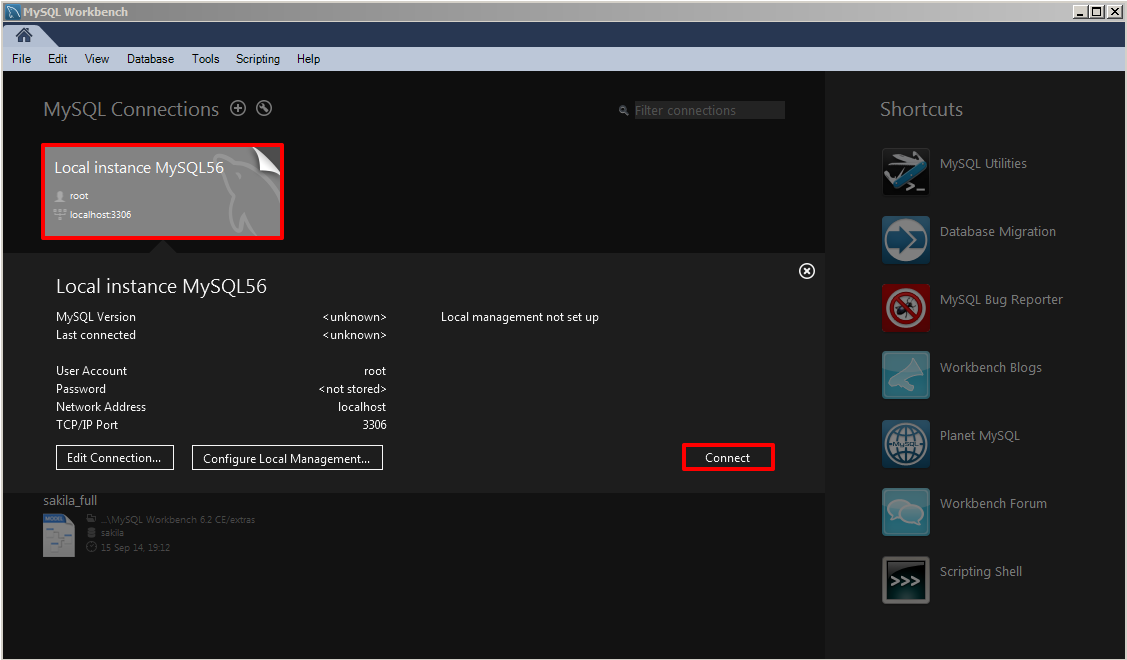
Once MySQL Workbench has been started, click on the Local instance MySQL button and select Connect to begin the configuration process.
Step 3
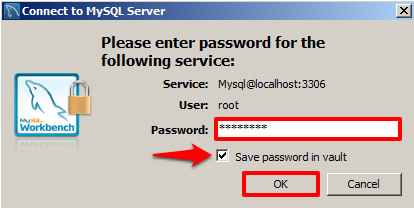
When prompted, type the MySQL server password, g56*k9lp (or your custom root password), previously created during the MySQL installation process. You have the option to check the box to Save password in vault for easier access in the future. Click OK to continue.
Step 4
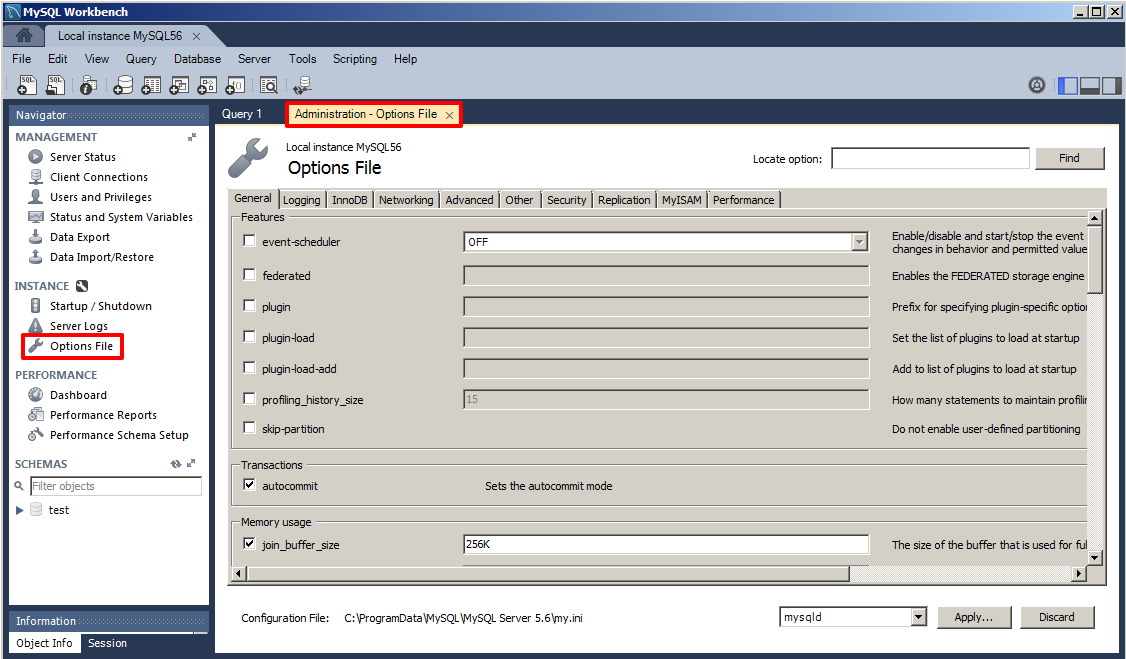
From the Navigator bar on the left-hand side, select Options File under INSTANCE (you may have to re-size the upper half of the menu in order to see and click on this selection). This should open up a tab named ‘Administration – Options File’.
Step 5
Click the General tab and scroll down to the SQL section.
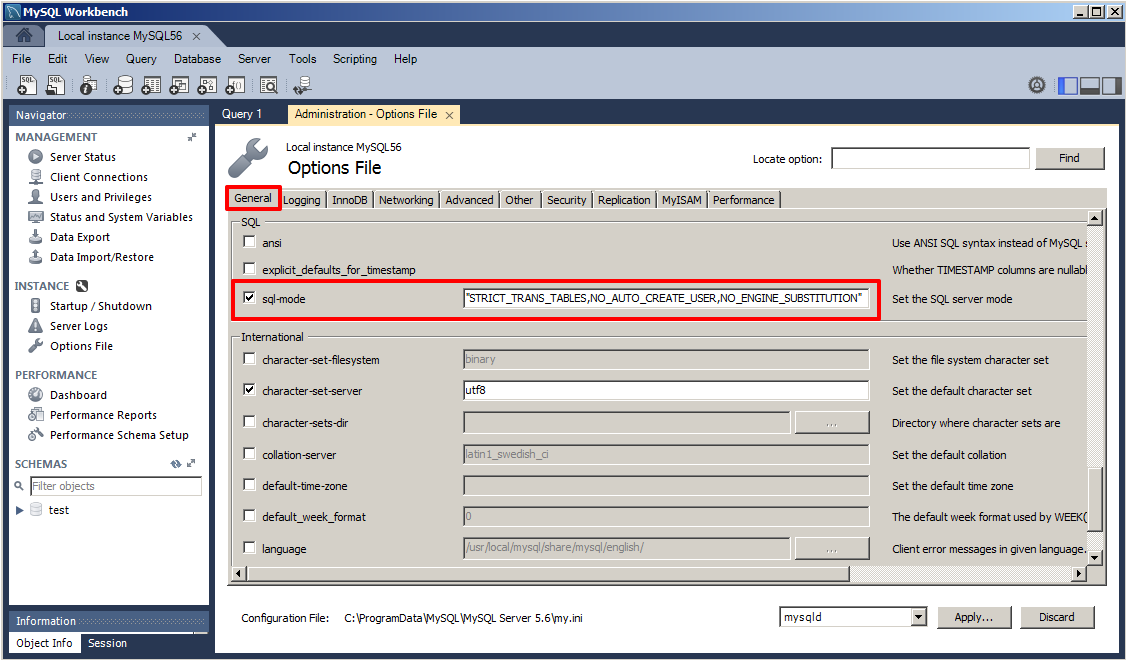
Step 6
In the ‘sql-mode’ text field, add the following to the existing string (before the closing quotation marks): ,ANSI_QUOTES .

Warning
Be sure to add the comma and do not leave any blank spaces.
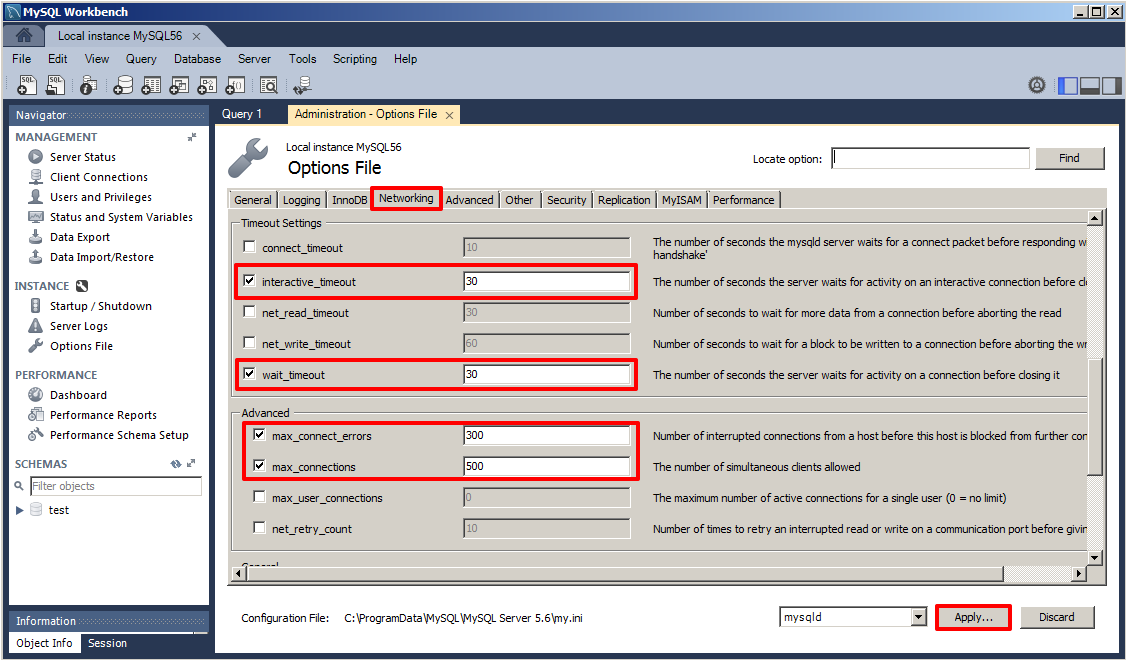
Step 7
Click the Networking tab and scroll down to the ‘Timeout Settings’ and ‘Advanced’ sections. Make the following changes:
- Check the box for interactive_timeout and give it a value of 30
- Check the box for wait_timeout and give it a value of 30
- Check the box for max_connect_errors and give it a value of 300
- Check the box for max_connections and give it a value of 500
When finished, click the Apply button to continue.
Step 8
In the ‘Apply Changes to my SQL Configuration File’ window that lists all the configurations that were just made, click the Apply button to confirm the changes.

Step 9
In the Navigator pane on the left, select ‘Startup / Shutdown’ under INSTANCE. ‘The database server instance is’ should read ‘running’. Click the Stop Server button.

Step 10
Wait until you see the ‘The database server instance is’ reads ‘stopped’; this confirms that the MySQL server has shut down. Restart the server at this point by clicking on the Start Server button.

Note
You have completed the MySQL Setup (Workbench). You may now proceed to the Appspace Installation article.